In case you hadn’t noticed, we are increasingly reliant on our smartphones to perform a range of tasks. Viewership through pocket devices up 35% from last year and mobile gaming is also on the rise. While phones are made to contact someone, it is as entertainment hubs that they are most appreciated in the modern age.
Contents
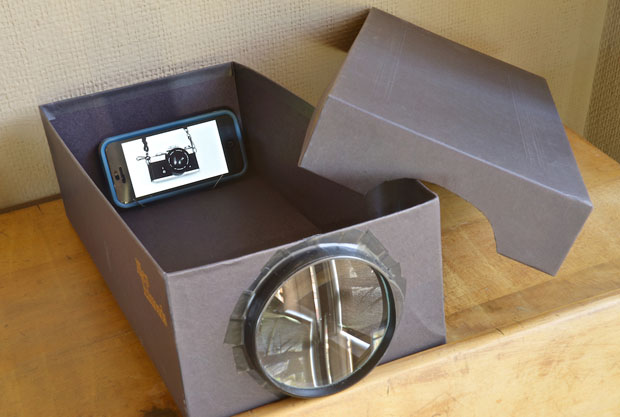
With this in mind, you may have flirted with the idea of turning your handset into a DIY smartphone projector. This video by TechBuilder can help you bring this concept to life, so long as you have the following items:
- A Hack-saw
- A Shoe Box
- A Magnifying Glass (for the projector lens)
- A Foam Board
- A Box Cutter
- A Glue Gun
- A Ruler
- A Compass
- Some Cellotape
- Your Smartphone
What to Look Out for When Making Your DIY Smartphone Projector
With these items, you can begin to construct your simple and yet ingenious DIY smartphone projector using the steps in the video. Remember to keep the following points in mind:
- Use lots of glue when securing the shoe box. This prevents it from wobbling when the section is cut for the projector lens.
- Use a compass to guide the box-cutter blade as this creates a precise hole for the lens.
- When securing your smartphone against the foam board, ensure that it is placed centrally and aligned with the lens.
- Remember to focus the lens (once complete) by moving the smartphone back and forth within the casing.
Frequently Asked Questions and Answers
- Can you make modifications to optimize the Audio Output?
You can punch a small hole on the casing and connect an auxiliary cable. If not, consider using either a Bluetooth speaker or a sound bar to optimize the sound. - How can I improve the clarity of the picture after calibrating?
Before you place your smartphone in the casing, adjust the sharpness, brightness, and contrast settings the get the best clarity and quality of image. - Can I use any phone on this project?
While the video uses an iPhone, you can use any Android or Apple handset so long as the casing is cut to a proportionate size.


